Getting Started - 1 - Enabled Data Flow
This guide is part of a 3 part Getting Started series:
- Enable Data Flow
- Enhance Data
- Customise
This guide aims to help you take your first (and most important) step with Secure60 - Enabling data flow
We recommend this is the first activity you work on with Secure60 as its simple and quick to achieve and delivers a wide range of benefits to your business:
- Wholistic Pane of Glass visibility
- Audit capability
- Compliance requirements
- Threat hunting
- Basic Threat Detection
Overview
In this guide we will enable a simple deployment of the Secure60 Collector, this instance will be the data collection point that your devices send Events to, which are then securely transported to the Secure60 Platform Ingest endpoint.
Once you have completed this guide you will have a Secure60 Collector running that is listening on both Syslog (/Secure Syslog) and HTTP(/S) protocols for data and will automatically send Events to the Secure60 platform.
Requirements:
- Any OS (Linux, Mac or Windows)
- Docker installed on OS (Docker Engine Install)
- A Secure60 account and username. To have an account created contact: support@secure60.io
Step 1 - Create a Collector Group
In order to enable Secure60 for your organisation you need to create a Collector Group and generate an .env file. This contains your Ingest Access Token and configuration, allowing the Secure60 Collector to securely send data into your Secure60 Organisation / Project.
In the Secure60 portal browse (Left hand nav menu) to Integrations → Secure60 Collector → Collectors
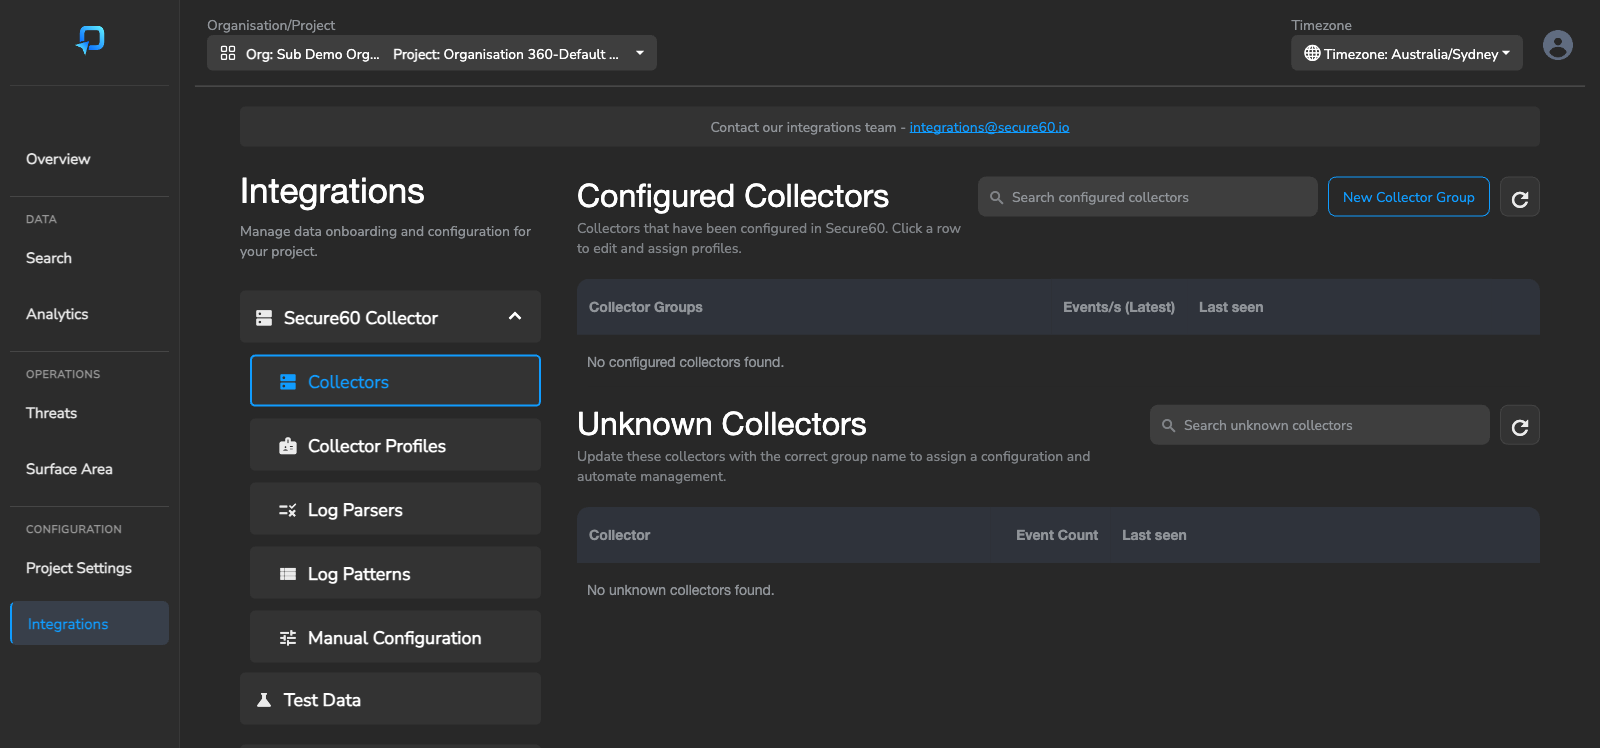
- Click the “New Collector Group” button (top right of the Configured Collectors section)
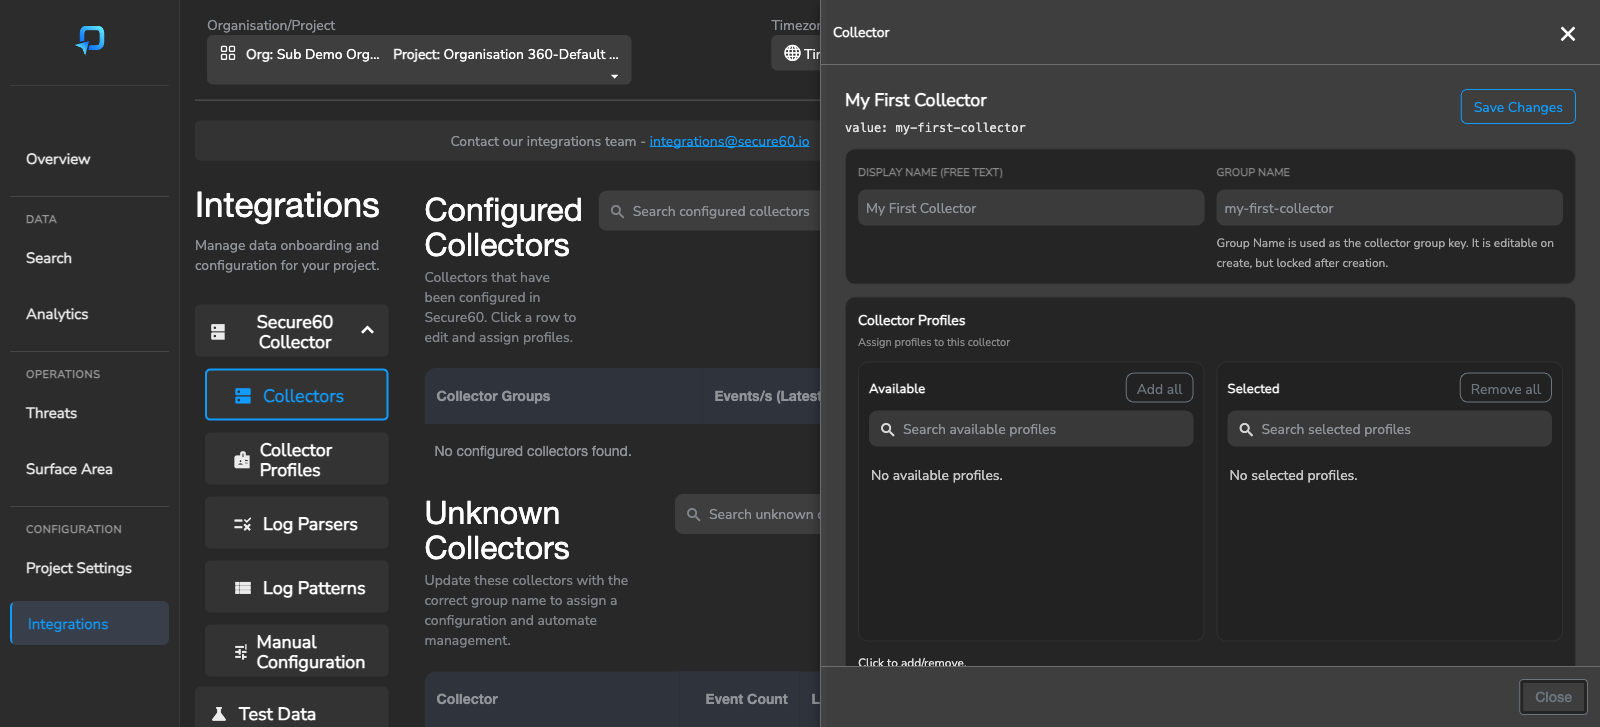
- Enter a Display Name (e.g. “My First Collector”) and a Group Name (e.g. “my-first-collector”)
- Click “Save Changes”
Step 2 - Generate the .env File
After saving, scroll down within the Collector Group panel to find the deployment section.
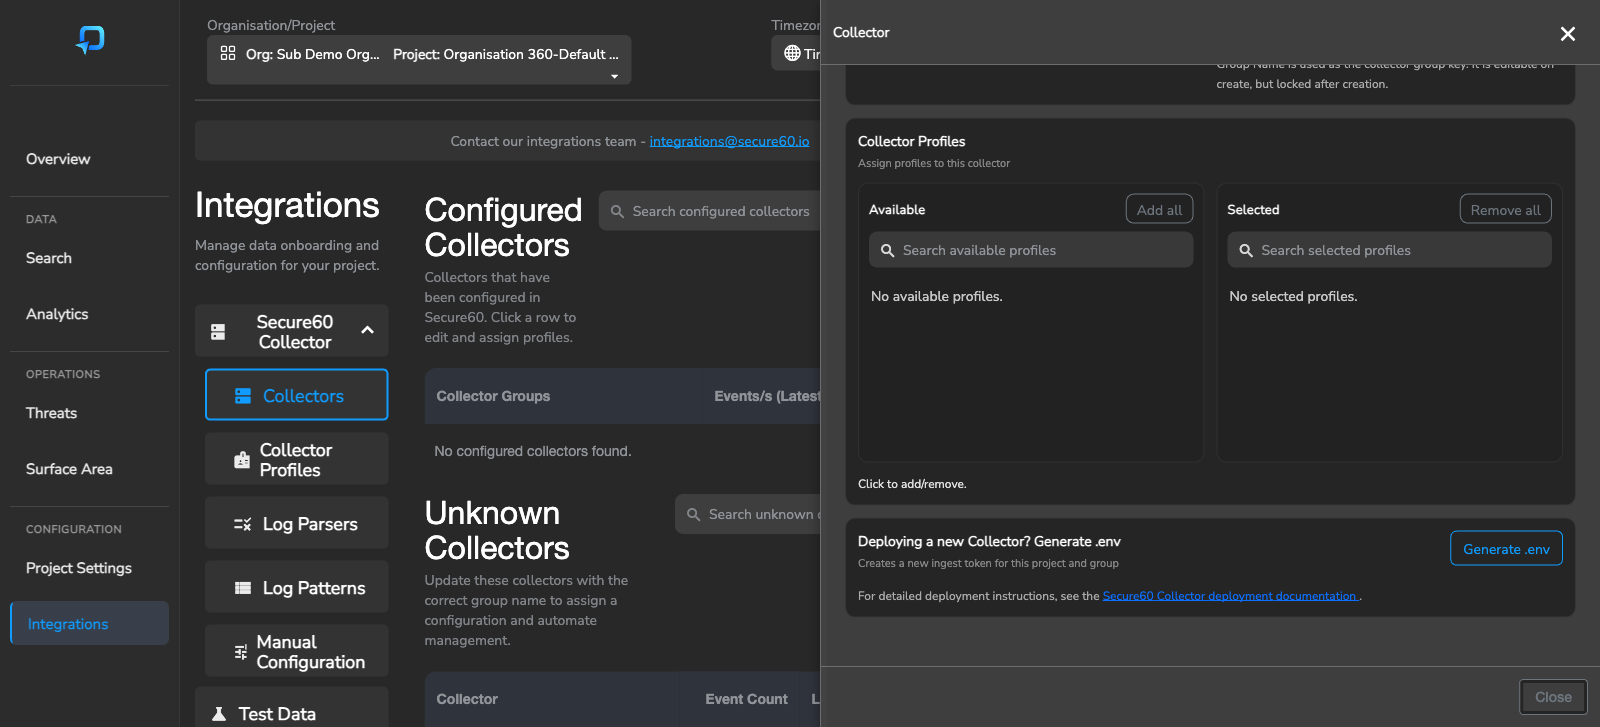
- Click the “Generate .env” button to create an Ingest Token for your Project and have it automatically inserted into the
.envfile output

- Copy the
.envfile contents to a safe location — you will use this in the following step
Step 3 - Deploy the Secure60 Collector
We now spin up an instance of the Secure60 Collector using the .env file that we previously generated. This pre configured .env file has the credentials and configuration for the Secure60 Collector to work out of the box.
Ensure docker is installed on the OS that you wish to deploy the Secure60 Collector on, See: https://docs.docker.com/engine/install/ for Docker specific instructions for your OS.
Run the Secure60 collector leveraging the .env file and port mappings to allow inbound connectivity to the collector instance:
docker run -i --name s60-collector -p 80:80 -p 443:443 -p 514:514/udp -p 6514:6514 -d --rm --env-file .env secure60/s60-collector:1.10
Note: If the container doesnt start, run the above command without the -d switch to allow output of startup errors.
Or using Docker Compose (recommended for ongoing use):
Save the following as docker-compose.yml in the same directory as your .env file, then run docker compose up -d:
services:
  s60-collector:
    image: "secure60/s60-collector:1.10"
    container_name: "s60-collector"
    ports:
      - "443:443"
      - "80:80"
      - "514:514/udp"
      - "6514:6514"
      - "5044:5044"
    env_file:
      - .env
    restart: 'always'
Step 4 - Send data to Secure60
Now that you have the Secure60 Collector running in your environment you can configure any device to send information to Secure60 via the collector.
To send a sample syslog message that will show up in the Secure60 platform use netcat (available on most OS’) on the same system that you installed Secure60 Collector (or change the 127.0.0.1 address below) as follows (Note: Change the DateTime to reflect current UTC time so that yours logs show up in the search for last 60mins):
nc -w1 -u 127.0.0.1 514 <<< "Jan 29 15:49:48.699: %BGP-3-NOTIFICATION: sent to neighbor 10.0.1.101 4/0 (hold time expired) 0 byte"
For any further questions make sure to reach out to support@secure60.io, We have a team ready to assist with any futher questions